Overview
Procedure
Toolbox

Anchoring Phenomenon

Objects do not move on their own.

Lesson Concept

Conduct an investigation to collect data about the effect of the strength of push on an object.

Investigative Phenomenon

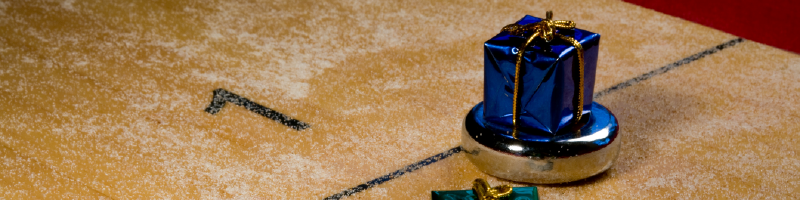
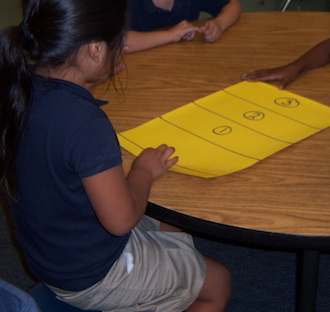
Discs move different distances.

Standards

Click here for NGSS, CCSS-ELA, and California ELD standards.

Time | Materials | Advance Preparation

Time

115 minutes

Parts represent different sessions on different days for kindergarten.

Part I45 minutes
10 minutesEngage
25 minutesExplore I
10 minutesExplain I
Part II30 minutes
20 minutesExplore II
10 minutesExplain II
Part III30 minutes
20 minutesExplore III
10 minutesExplain III
Part IV10 minutes
10 minutesElaborate/Evaluate

Materials

Whole Class

  • K.3.C1: Class Notebook (continuation of K.1.C1: Class Notebook started in Lesson 1: Exploration Box)
  • Shuffleboard video
  • Two cones to mark the finish line (outside)
  • Two balls (soccer or playground balls)

Per Group (Groups of 2)

  • Cruising Disc Game Board (see Advance Preparation)
  • Disc (a washer approximately 1 to 2 inches in diameter)

Individual

  • Kindergarten science notebook
  • Pencil
  • K.3.H1: Sandy and Diego
  • Clothespin, clip, or sticky note with each student's name written on it

Teacher

Advance Preparation

  1. See K.3.R1: Cruising Disc Game Board which shows an actual game board and model of what you will be drawing. Prepare a Cruising Disc Game Board for each group by drawing three lines of different lengths 4 inches apart on 12” by 18” construction paper. Label them 1, 2, and 3. Draw and label a start line where students will begin pushing the disc. (For Parts I–II)
  2. On the opposite end of the game board, draw a small rectangle about 2 inches by 4 inches wide and write GOAL inside it. (for use in Part III)

    Laminate the game boards if possible.
  3. Review the shuffleboard video and select a short clip of students playing shuffleboard
  4. Prepare materials for predicting (step 10) by:
    1. making three different signs with words large enough for the class to read:
      1. Greater
      2. Same
      3. Lesser
    2. each student’s name written on an individual clothespin or clip, or use small sticky notes
  5. Make copies of K.3.H1: Sandy and Diego.
  6. Prepare K.3.C1: Class Notebook as described in the Toolbox for this lesson. You might want to pre-make the table for recording the results of the student’s predictions and results.

Part I

Engage (10 minutes)

Observe effects of pushing shuffleboard discs towards a goal.

  1. Display the Class Notebook with a list of questions from Lesson 2: Pullapalooza. Circle a question about the speed or distance a ball travels from a kick and identify this question as the one to figure out today.
  2. Place a disc (washer) on the floor or table in front of the students. Have students observe the disc and ask, “What do you need to know about this disc to make it move?” Chart student responses on K.3.C1: Class Notebook; e.g. Where can we move the disc? How far can it move? Can I move it with something?
  3. Ask students if they have played games where a stick moves an object or ball. Share some ideas.
  4. Show the shuffleboard video and ask students to watch closely to see how the shuffleboard disc is moved in the game. Ask students to share some ideas of how the game is played.
    1. Show the shuffleboard video again and ask students to see if they can figure out how the students score points.
    2. Ask the students to think about this question: “What would you like to ask the students in the video about how to play shuffleboard?” Chart ideas on the K.3.C1: Class Notebook.
    3. Answer student questions about playing shuffleboard.
  5. TEACHER NOTE

    You may want to pause the video a few times and ask the students questions about how the disc moved. “What did the boy use to move the disc? Did they push it or pull it? Did the disc move the same distance every time?”

Explore I (25 minutes)

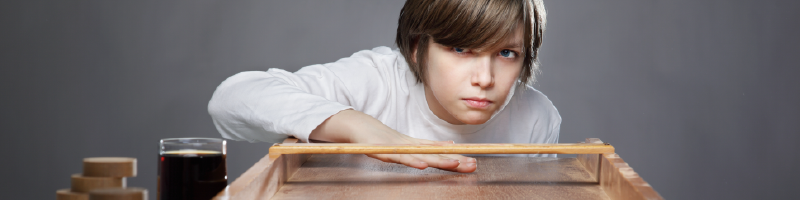
Carry out an investigation to determine if different amounts of force cause a disc to move different distances.

  1. We do not have a shuffleboard at our school, but we can play mini-shuffleboard to figure out some of the strategies the students in the video used. Show the students the Cruising Disc Game Board and point out the starting point for the disc. Explain that this a mini-shuffleboard game. The goal is to push the disc, using your finger, so that it stops exactly in Box 1 without touching the lines. Remind students of how the boy in the video moved the disc. They must release the disc in the start line.
  2. Image via Vista Unified School District
    [Used with Permission]
    Image via Lakeside USD
    [Used with Permission]
    This classroom used sticky notes
    instead of clothespins.
  3. Give students the disc and Cruising Disc Game Board and have them practice getting the disc into Box 1 for about 5 minutes.
  4. Ask students to leave their materials at their tables and gather at the meeting place. Ask, “What did you notice about the movement of the disc? How did you cause the disc to move and stop in Box 1? When it did not go into Box 1, how did you change your push?” Record results of how to get the disc to Box 1 on a new page of the K.3.C1: Class Notebook.
  5. Explain to them that they will get only one chance to push the disc into Box 2. Use this sentence frame:
    In order to get the disc to Box 2, I predict that I will _____.
  6. Have students think-pair-share their predictions for how to push in order to reach Box 2.
  7. Show the signs you prepared with the three words greater, lesser, and same on them. Students will attach their name clothespin on the paper that represents their prediction to get the disc to Box 2.
  8. Count the number of responses in each category. Record the predictions for Box 2 on a page of the K.3.C1: Class Notebook, leaving a space for both prediction and results for Box 2.
  9. TEACHER NOTE

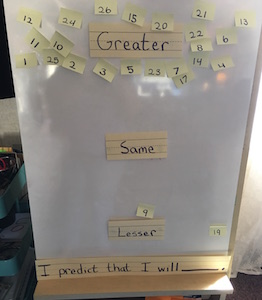
    Once students have figured out how to get the disc in Box 1, their discussions should include greater push or lesser push rather than harder and weaker/softer. This is an opportunity to refine their language using push, and greater push, greatest push to show changes in force. The collaborative plan also supports English Learners as they share ideas to develop the plan.

  10. Students return to their game boards and wait for you to say, “Go.” Each partner will get just one chance to get the disc into Box 2. Record the results for Box 2 on a page of the K.3.C1: Class Notebook next to the predictions.

Explain I (10 minutes)

Compare data from observations that show the effect of different strength of pushes to the distance the disc traveled.

  1. Return to the meeting place and ask students to review the predictions and results for Box 2 on the K.3.C1: Class Notebook. Ask, “Was your prediction supported? How do you know? What is on the chart that would make you change your prediction if we did the test one more time?” Discuss with a partner. Share a few ideas.
  2. TEACHER NOTE

    Use the word supported because that is how scientists would describe the results of the test. The observations students made would support (or not support) their predictions. Avoid words such as right/wrong or good/bad as these imply value judgments. Have a discussion with students about what the word accurate means.

  3. Have students repeat Steps 10, 11 and 12 for Box 3. Ask students to gather at the meeting place. Have a class discussion by asking students, “What did you have to do to make the disc slide to box 1? How was that different from Box 2? What did you have to do to get the disc to slide to Box 3? How was that different than sliding the disc to Box 2?” Record predictions for Box 3 on the K.3.C1: Class Notebook.
  4. Image via Emerson/Bandini Elementary,
    San Diego Unified School District [Used with permission]

Part II

Explore II (20 minutes)

Carry out an investigation to determine if strength of of a push affects speed.

  1. To introduce measurement of time with the students, take the cruising disc activity outside. Set up an area with a start line and finish line at least 20 feet apart. Using two playground or soccer balls, have two students push the ball at the same time to see which ball goes faster by crossing the finish line first. Counting aloud, “1 and 2 and 3 . . .” to measure how long it takes the first ball to cross the finish line. Repeat with other student pairs.
  2. Return to the classroom and lead a discussion about how moving the soccer ball faster is like pushing the discs. Say, “Today we get to do a challenge of whether you or your partner can push the disc so see which disc is faster by determining the disc that crosses the end of the shuffleboard game board first. Each of you will get a disc.” Ask, “What do you need to know to find the faster disc?” Chart students’ questions in the K.3.C1: Class Notebook.
  3. Set up two pairs of students in a group of four, and distribute two discs to the group. Two students will watch and be the referees to see which disc lands in goes over the end of the game board first. Have all pairs place their discs at the start line. When you call out, “Ready, Set, Go,” each student will push his disc, trying to go over the end of the game board first but make sure it does not go off the sides of the game board. The winning disc is the one that stays on the game board but crosses the end opposite the start line first.
  4. After the first race, allow partners time to explain why one disc went faster than the other. Have students switch roles so that the referee pair gets a chance to play. Students can conduct multiple disc races and monitor to see if students try to change the strength of their push.

Explain II (10 minutes)

Compare data from observations that show the effect of different strength of pushes on the speed of the ball.

TEACHER NOTE

A bigger push or pull results in greater speed. In this case, speed is represented by the first disc to cross the line at the end of the shuffleboard. (using relative time appropriate to kindergarten.)

  1. Ask, “What did you notice about the disc that won the race? Which disc moved faster? How do you know?” Have partners share ideas with the class and record results on a page in the K.3.C1: Class Notebook.
  2. Review the results of the partner races. Ask, “How might knowing about pushes that are stronger help us to move a ball towards a goal in soccer?”
  3. Distribute K.3.H1: Sandy and Diego. Orient students to the handout names and figures.
    1. Have students find the picture that goes with number 1 on their handout. Ask, “What kind of push (kick) would Sandy need to use to move the ball to the goal?” Tell students they can look around the room or in their notes for any words that will help them. Also tell them to draw and path of the ball from Sandy to the goal.
    2. Have students find the picture that goes with number 2 on their handout. Ask, “What kind of push (kick) would Sandy need to use to move the ball to Diego?” Write their response and draw the path of the ball from Sandy to Diego to the goal.
  4. TEACHER NOTE

    Monitor students while they work and look for examples of student work to share. Look for a couple of examples that show a greater push with a longer arrow. The game board for shuffleboard can be placed in the choice centers for at least a week to encourage the use of the academic language and comprehension that a greater push causes a longer distance traveled and a lesser push causes a shorter distance traveled. The choice centers could include words on cards such as greater push, greater distance, less push, less distance to encourage high-level students to read and label the results.

  5. Share examples with the whole class. Encourage students to use a uniform way to show movement with arrows. Then allow students to return to update K.3.H1: Sandy and Diego.

Part III

Explore III (20 minutes)

Predict and observe the cause of making an object stop its movement.

  1. Ask students to think-pair-share about a soccer game and what happens if someone kicks the ball toward the goal. “What might cause the ball to stop?” Chart student ideas in the K.3.C1: Class Notebook under the heading, “Stopping the Ball.”
  2. Show Side 2 of the Cruising Disc Game Board. Tell students they will work in pairs. One student will try to make a goal with the disc, and the other will act as the goalie and try to stop the disc. Ask, “If you are the goalie, what can you do to stop the disc from going inside the goal?” Add ideas on the K.3.C1: Class Notebook.
  3. Students can take turns being the goalie and kicker. They may also want to keep score by counting to 5 goals before switching roles.

Explain III (10 minutes)

Compare predictions to observations of how pushing an object can cause the object to stop.

  1. Come back to the meeting area. Facilitate a discussion using the following questions: “How did you stop the discs? What was the best way to stop the discs? What happened when you didn’t stop the disc?” Label a page of the K.3.C1: Class Notebook with the heading, “How to Stop a Disc or a Soccer Ball.” Record student ideas for stopping the ball.
  2. Discuss the difference between strong and weak pushes and read the book Duck in the Trunk listed in the Literacy Links (below). Discuss the movement described in the book. Lead a discussion of what is real in the book and what is not real. (Fiction)

Part IV

Elaborate/Evaluate (10 minutes)

Compare observations linking the results of pushing with different strengths or stopping movement to soccer moves.

  1. Say, “Let’s think about how we pushed the disc and stopped the disc. How can that help us in a real soccer game if we want to move the ball to the goal?” Have students draw a picture in their science notebook showing how to push the ball farther, push the ball closer, and stop the ball.
  2. TEACHER NOTE

    Place the game boards in the choice centers for several days. Listen to students using language that describes movement.

  3. Review the K.3.C1: Class Notebook and talk about what we have figured out. We know how to make a motionless object move with a push or pull, how to move objects with a push or pull, how to make the push stronger or harder, and how to stop the ball. Ask, “What else do you think we need to know about playing soccer?” Chart ideas on a new page of the K.3.C1: Class Notebook. Student questions may include: How do we aim the ball? How do we push the ball harder? How do we get around another player? What else pushes the ball?
  4. TEACHER NOTE

    Encourage connections from the disc experience to soccer, especially harder kicks increasing speed and distance. The movement continues unless something stops the movement with a backward push. This might be another player or the goalie. Students still do not know to use other players (collisions) or factors like weather that might cause changes in the way the ball moves.

Literacy Links

It would be appropriate to have students interact with text to extend their understanding of pushes. These selections can be read aloud at any time after this lesson where students have experienced pushes. Suggested books include the following:

Fiction:

References

Alborough, J. (2014). Duck in the Truck. Tulsa, OK: Kane Miller.

Merz, J. J. (2007). Playground Day! New York, NY: Clarion Books.

Shaw, N., & Apple, M. (2019). Sheep in a Jeep: 5-Minute Stories. Boston: Houghton Mifflin Harcourt.

Toddgabweg. (2017, May 14). Shuffleboard video. Retrieved from https://www.youtube.com/watch?v=XBsj3HqYx9M

Resources


Download K.3.C1

Download K.3.H1

Download K.3.R1