Overview
Procedure

Anchoring Phenomenon

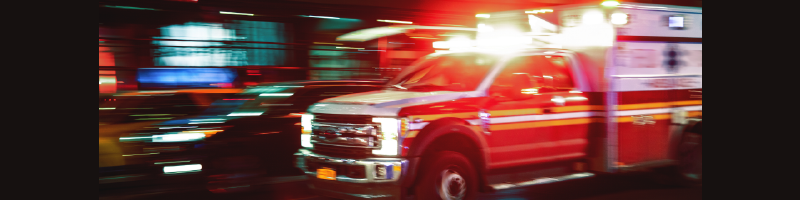
Emergency sirens make loud sounds.

Lesson Concept

Students will define a simple problem (non-working siren) and design a communication device that solves this problem through engineering.

Investigative Phenomenon

Devices communicate over a distance using sound.

Standards

Click here for NGSS, CCSS (ELA), and California ELD standards.

Time | Materials | Advance Preparation

Time

195 minutes

Part I40 minutes(Engage)
Part II40 minutes(Explore Part A)
Part III45 minutes(Explore Part B)
Part IV45 minutes(Explain)
Part V25 minutes(Evaluate)

Materials

Whole Class

  • Whistle for demonstration
  • Siren or siren video
  • What I Wonder T-Chart from Lesson 1.1: Sound Vibrations

Group

  • Enough of the following for groups to build a variety of devices:
    • rubber bands
    • cardboard
    • tongue depressors
    • shoe boxes
    • spoons
    • paper plates
    • beans
    • rice
    • empty bottles
    • masking tape

Individual

  • Science notebook

Teacher Use

Advance Preparation

  1. Determine when and where students will test their devices. (Step 13 of Procedure) The area will need to be large enough for the devices to communicate over a distance, but not too large that the devices are all unsuccessful. The testing will also need to take place during a time when there are not many other noises occurring, like recess or lunch.
  2. Collect the materials for groups to use to build their device. (rubber bands, masking tape, cardboard, tongue depressors, shoe boxes, spoons, paper plates/bowls/cups, beans, rice, empty bottles)
  3. Review 1.1.R2: Performance Assessment Checklist from Lesson 1.1: Sound Vibrations. (Step 14 of Procedure)

Part I

Engage (40 minutes)

Explain that vibrating matter causes sound that can be used to communicate over a distance.

  1. Seat students at the carpet. Ask students to turn to a partner and answer the question from Lesson 1.1: Sound Vibrations, What causes sound? Have a couple of students share out their answers. Ask students how they know and have a couple of volunteers share their answers.
  2. Replay the siren and ask students what questions have been answered about the sound of the siren (what causes the sound), what questions remain on the What I Wonder T-chart (Lesson 1.1: Sound Vibrations, Step 4 of Procedure), and what other questions they might now have; record these on the T-chart and discuss how they think they could answer these questions. Explain that they will be discussing why a siren has to be so loud, and then they will design and test devices that can communicate over a distance.
  3. Show students a whistle; ask them where they have seen this before and what was it used for. Have a few students share out. Blow the whistle. If you have students who are hard of hearing or deaf, have them touch the whistle as you blow it and let them know that the whistle is making a sound. Ask each student to think about what is causing the sound they hear/feel. Then have students turn to their partner and share what they think is causing the whistle’s sound. Now walk around the circle and blow the whistle in front each student so that they can see the ball vibrating inside the whistle. Have them once again turn to their partner and share what is causing the whistle’s sound.
  4. Blow softly and blow loudly. Ask students to think about what they notice about the sound. Have students share their observations with a partner. If you have students who are hard of hearing or deaf, make sure that hearing students share that there is a sound and that is louder or softer depending on how you blow the whistle. Reinforce the word vibrate, as well as the cause and effect relationship by having students state what caused the effect (something moving back and forth very fast causes sound, blowing hard causes a loud sound, blowing soft causes a quieter sound). (Refer to the Scaffolds for Cause and Effect in the Introduction, or point to a cause and effect chart if displayed.) Ask students to come up with questions they might have about the whistle, and how it is similar to or different from what they observed in the previous lesson. Record their questions on the T-chart.
  5. Ask students what whistles are used for (communication). Then ask whom the whistle is communicating with (students on a playground, players on a field). Show the siren or siren video again. Ask students what the siren is used for (communicating an emergency). Then ask whom the siren is communicating with (cars, people on the street). Ask students “What is the same about the way the siren and the whistle communicate?” (They are loud.) Ask students “Why are these sounds loud, and what would happen if they were quiet?” (They are loud in order to communicate over a long distance; if they were quiet, people wouldn’t be able to hear them.) Let students know that sirens have both loud sounds and bright lights to communicate because some people cannot see well, and some people cannot hear well.

Part II

Explore Part A (40 minutes)

Design a device that causes a loud sound to communicate over a distance.

  1. Begin by blowing the whistle and playing the siren. Ask students what caused each device to be able to communicate over a distance. Have a couple of students share out. (Both items were loud enough to be heard from a distance.)
  2. Set up the scenario by asking students “What would happen if the siren of an ambulance was not working?” Ask students to discuss in their groups why this might be a problem. Discuss as a class and chart the group’s responses.
  3. Summarize the problem: The siren is not working, so you need to help the medics so that they can drive safely through the streets to help someone who needs medical attention. Present the challenge: Design a device that makes a loud noise that you can use in your pretend ambulance to drive safely through the streets. Because of our materials, we can’t design a device as loud as a siren, but we can still create loud devices that can be used to communicate over a distance outdoors.
  4. Show students the materials that they will be using for the investigation (rubber bands, cardboard, tongue depressors, shoe boxes, spoons, paper plates, beans, rice, empty bottles, etc.). As you introduce the materials that will be used, find a way to display the item, or a picture of it, with its name. This will provide a reference for students during their planning.
  5. Pose the challenge to students again: How can we design and test a device that causes a loud sound using these materials? Let students know that they will be making the loudest sound they can with the materials they have, but that this sound would never be as loud as a real ambulance siren. Have students return to their seats and independently think about how they could use the materials to complete this task. In their notebook, have each student draw the design for their device.

Part III

Explore Part B (45 minutes)

Design a device that causes a loud sound to communicate over a distance.

  1. Bring the students together. Ask them to describe the problem and the challenge outlined in the previous session.
  2. Send students back to their groups. Have each student share their designs from Step 10 of Procedure in their group. Each group needs to decide on one design to construct. As they reach consensus, check in with each group to see their plans for the device they will be building and give feedback as needed.
  3. Set the materials at a central location and have the getters bring materials to each group.
  4. Give each group time to construct their device. As they work, use 1.1.R2: Performance Assessment Checklist from Lesson 1.1: Sound Vibrations to make quick notes on how students are doing in all three dimensions. (Later, use the Grade 1 Sounds Instructional Rubric in the Introduction to determine each student’s level of understanding of DCI, CCC, and SEP.) As students explore, ask questions about what they see happening to cause a sound. Encourage students to use the sentence frame to explain the cause and effect relationship.
  5. TEACHER NOTE

    The time needed for each group to construct their device may vary depending on the students’ comfort with constructing devices.

Part IV

Explain (45 minutes)

Design a device that causes a loud sound to communicate over a distance.

  1. Bring the students together. Ask them to describe the problem and the challenge that their devices are meeting. Have students think-pair-share how to design a simple test to find out if their devices are effective–that they can be heard (communicate) over a distance. Take a few ideas and acknowledge them.
  2. Bring the class outside to a field or blacktop area. Have each group set their device on the side, out of their hands and away from the other students. Line up the class on one side of the field. Send one group to the other side of the field to demonstrate their device. Have students give thumbs up if they can hear the sound. Repeat for each group.
  3. After all groups have tested their device, ask if all the groups met their goal, to “design a device that causes a loud sound to communicate over a distance.” Some devices will be louder than others, and some may be too soft and not be heard at all. Explain that many times engineers do not meet their goal the rst time they try and have to revise their design and try again; they learn from their mistakes. Then ask each group to discuss how their device was the same as and different from the other groups’ devices.
  4. Encourage them to talk about cause and effect relationships. As in the previous lesson, ask students if they observed any patterns among all the devices. (Optional scaffold: “A pattern I observed is ___.” or “I think this is a pattern because ___.”) Through a guided discussion, reinforce the notion that vibrating matter causes sound and this pattern is repeated in every device they designed and built.
  5. Demonstrate the siren for the class from the same location across the field. Bring students into a circle to think about whether their device communicated effectively, though not as loud, as the siren.
  6. TEACHER NOTE

    Be sure the area you choose for students to demonstrate their devices does not have too much background or ambient noise and has lines or demarcations that allow all of the groups to demonstrate their device from the same distance.

    Be sure to set up norms with your students before going outside. Suggested norms include using a different door than the recess door, meet and make a circle to review what will happen outside before beginning the activity, have students face away from the sun so that they can see.

Part V

Evaluate (25 minutes)

Explain how a device causes a loud sound to communicate over a distance.

  1. Ask students to describe what they did in the last session. Have them explain the simple test they carried out (taking their devices outside and testing them one at a time) to gather evidence that vibrations in their devices caused sound to be heard over a distance, and what they observed. Have students discuss why they think some of the devices were louder than others and how they think they could make their devices even louder. For students who are exceeding expectations, introduce the notion of variables and ask what they think would happen if the string was longer or shorter or the drum was larger or smaller, for example. (If time permits, have the groups redesign their devices and test them again.)
  2. Have each student draw the revised device their group came up with in their notebook and label the parts. Review the conventions of drawing and labeling models (e.g., using arrows to show movement, labeling with lines). In pairs, have students practice asking each other questions about their models using these prompts:
    • What does your model explain?
    • What does this part show?
    • How could you show ___ another way?
    Have students discuss how their drawings (models) help them understand how their devices work and also help them communicate this to others.
  3. Using their model from the previous step, have students explain in writing what caused their device to be able to communicate across a distance. (Optional scaffold: “The ___ causes ___.” or “The effect of ___ is ___.” or “___ causes ___.”). Discuss why scientists and engineers look for cause and effect relationships. Ask students how the cause and effect relationship helped them understand more about a phenomenon.
  4. Have students explain why ambulances have sirens and how they think the siren might cause the sound. Revisit the What I Wonder T-Chart with the list of questions from Lesson 1.1: Sound Vibrations, Steps 3 and 4 of Procedure, and discuss which questions have been answered. Continue adding, revising, and connecting to their learning by recording what they found out in this lesson under What I Found Out. Ask what other questions they might have, and record these. Ask what they could do to find answers to their other questions.
  5. TEACHER NOTE

    Collect the notebooks at the end of the session and review students’ answers to the question: What caused their device to be able to communicate over a distance? (See Step 22 of the Procedure.)

    Expected student’s response: ___ vibrated in my device to cause the sound, which could be heard across the field. Ambulances have sirens because they have to communicate an emergency to people on the street or in other cars, and something must vibrate inside the siren to make the sound.

    Students may also write about how they made the sound louder, but this is not assessed at this grade.

    For students who are still struggling with the concepts, or for those students who are able to demonstrate an advanced understanding of the concepts at this time (see the Grade 1 Sounds Instructional Rubric in the Introduction), you can refer to Student Support Strategies at the bottom of the Introduction.