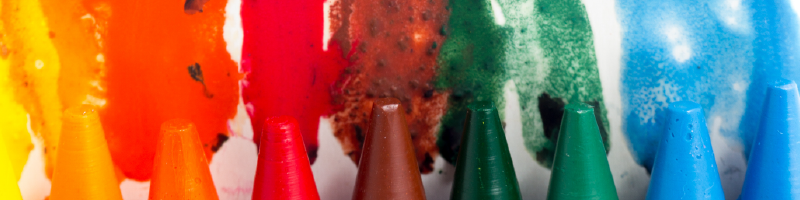


Materials are made of matter. We can observe misshapen objects, including a crayon, lip balm, and a candle.
Ask questions based on observations to find patterns of properties of different kinds of materials.
Objects, such as crayons, birthday candles, lip balm, and other objects in the classroom, look and feel different from each other.
Click here for NGSS, CCSS-ELA, and California ELD standards.
This unit serves as an introduction to the properties of matter, with the focus of building an understanding of properties of solids. As students engage in observations of solid matter around them, they have opportunities to connect their prior knowledge and language to the corresponding scientific vocabulary. This unit introduces students to the anchoring phenomenon: Materials are made from matter. We can observe misshapen objects, including crayons, lip balm, and a candle. (Note: throughout the unit, these three objects will be the focus; however, the properties of matter will be introduced via a variety of solids.) Investigating the properties of matter will help students generate the engineering problem. In addition, students are introduced to the development of an engineering problem by posing student-generated questions, such as, “How did the objects get this way?” or “How can we keep this from happening to the objects?” Students use their prior knowledge of daily interactions with matter as they begin by thinking about the everyday objects around them and the properties of the materials from which they are made. Students use prior knowledge from their five senses to make observations, find patterns in their observations, sort solid materials, and classify them by their properties. In the next lesson, students investigate the properties of liquids.
Throughout the lesson, a flag ( ) denotes formative assessment opportunities where you may change instruction in response to students’ level of understanding and making sense of phenomena.
| Part I | 50 minutes | |
| 15 minutes | Engage | |
| 25 minutes | Explore A | |
| 10 minutes | Explain A | |
| Part II | 70 minutes | |
| 60 minutes | Explore B | |
| 10 minutes | Evaluate |
Ask questions and observe the properties of a material.
The Engage stage of this learning sequence is intended to 1) generate students’ questions about the phenomenon (misshapen objects), 2) help students access their prior knowledge about the five senses and the ways the five senses are used to make observations, and 3) demonstrate that investigating the properties of matter will help students generate the engineering problem. Recalling how we make observations will help students with their investigation plans in the Explore stage of the learning sequence.
Do not use the vocabulary melted and unmelted during the Engage. This lesson helps students to eventually develop an understanding that matter exists as either a solid or a liquid depending upon temperature.
Accept questions about melting. Eventually, the students will discover that the objects changed shape due to a temperature change.
Retain the 2.1.C1: Student Question Chart. These questions will drive instruction and help students identify the engineering problem. Subsequent lessons will address some of the student questions from steps 1–3. Throughout the unit, students will collect evidence via experiences with the investigative phenomenon (objects, such as crayons, birthday candles, lip balm, and objects in the classroom, look and feel different from one another). This will help students develop better explanations for the anchoring phenomenon and continue to build on their understanding of the crosscutting concept of patterns from previous grade levels.
Refer to 2.1.H1: Engineering Planning Sheet. In addition to observing the properties of matter, students are beginning to identify the engineering problem, which is the Ask phase of the design process.
Carry out an investigation to observe properties of different kinds of materials.
Observe properties of different kinds of materials.
Have students write or draw their observations of the changed misshapen objects in their science notebook. Encourage students to use their own language related to describing the strength, flexibility, hardness, and texture of the objects. ESRs: I could not get the regular ones to look like the funny ones. When I hit it, the crayon crumbled. When I rolled it, the birthday candle broke. When I hit it, the lip balm broke and smeared. Use what students have written or drawn in their science notebook as a formative assessment of their emerging understanding of properties of solids (strength, flexibility, hardness, and texture). Accept student language that approximates the language we want students to use when they understand the concept of properties of solids. Explore B has a two-pronged emphasis. If students do not have a thorough understanding of the properties of solids, Explore B may be used to develop an understanding of the properties of solids. If students do have understanding without knowing the vocabulary, Explore B can be used to develop scientific vocabulary.
Carry out an investigation to observe and classify patterns of properties of different kinds of materials.
As you circulate among the groups, jot down words you hear the students use related to the properties of matter. Use the students’ prior knowledge and language to support the development of student understanding of the properties of objects and the anchoring phenomenon: Materials are made of matter. We can observe misshapen objects, including a crayon, lip balm, and a candle.
All of the items in this group are/have ___, while all of the objects in this group are not/do not have ___.
Students often will name an object rather than describe it. Redirect their thinking by saying, “Yes, that’s what we call that object. Now think about how you described it to us.” A possible exchange between you and your students might go like this:
Teacher: “Explain why you put that object in that pile.”
Student: “They are all markers.”
Teacher: “Yes, we call them markers. Now think about how you described it to us and use those words to tell us why they belong in that group.”
Student: “The case is smooth, hard, and round. I cannot bend it.”
As students figure out properties for each clump of sticky notes, facilitate categorizing based on patterns in student observations to include the following properties: color, texture, hardness, flexibility, shape, and other properties.
Observe and classify patterns of properties of different kinds of materials.
Throughout the Matter Unit, a 5E model will be employed; however, at the end of Lesson 1: Properties of Matter, there is no Elaborate because this phase of the 5E model will occur later in this Matter Unit.
Remind students of the anchoring phenomenon: Materials are made of matter. We can observe misshapen objects, including a crayon, lip balm, and a candle. Provide an opportunity for students to add to or revise their observations of the anchoring phenomenon in their science notebook. Encourage students to use the new descriptive words they have just learned.At this point in the lesson, students have been exposed to the anchoring phenomenon; however, they have not explained the anchoring phenomenon. Lesson 1: Properties of Matter builds to an understanding that in order to know if something has changed, one must know what it was like before it changed. Understanding the properties of solids will help students describe changes that resulted in the misshapen objects and formulate an engineering problem.
WikiHow. (2020, June 14). How to Melt Crayons. Retrieved June 29, 2020, from https://www.wikihow.com/Melt-Crayons